
Website Images Cheat Sheet
Thanks for signing up to receive this premium content!
Quick embarrassing story. I had always relied on exporting images out of Photoshop, setting the quality level as the only optimization step. Then, not too long ago, I discovered ImageOptim as a stand alone image optimization software tool which did far more to squeeze the size down while still maintaining the visual quality of the image.
As a tool solely dedicated to image optimization, it was a game changer and because it works as an easy drag-and-drop (i.e., it always sits open), I use it for everything — even sending images within emails to make my images load faster — especially on phones.
I’m embarrassed it took me 15 years to discover a stand-alone tool and process for optimizing my images.
Don’t make the mistake I did and start optimizing your images regularly. Make it a part of your daily process.

Download the free ImageOptim: https://imageoptim.com/mac
For windows and other platforms, take a look at: https://imageoptim.com/versions.html
#1: Optimize your image file to 100k or less
I’ve seen 1MB images size down to under 50k with ImageOptim and look no different to the naked eye.
I’ve also seen a site crawl to snail’s pace in loading a catalog of images when someone forgot to optimize the images.
Sometimes, when there’s only a single main image on a page, I’ll put up an image in the 200k range but anything much bigger you should consider editing that image down in dimensions* (see below) or finding a different image.
*Most phone pictures a huge in width compared to the 2,500 max width I’m recommending below. Sizing those down and then optimizing typically does the trick.
#2: Use .JPG for photos and .PNG or .GIF for illustrations or solid color images.
#3: Make all your images 2,500 or 1,500 pixels wide any any size tall.
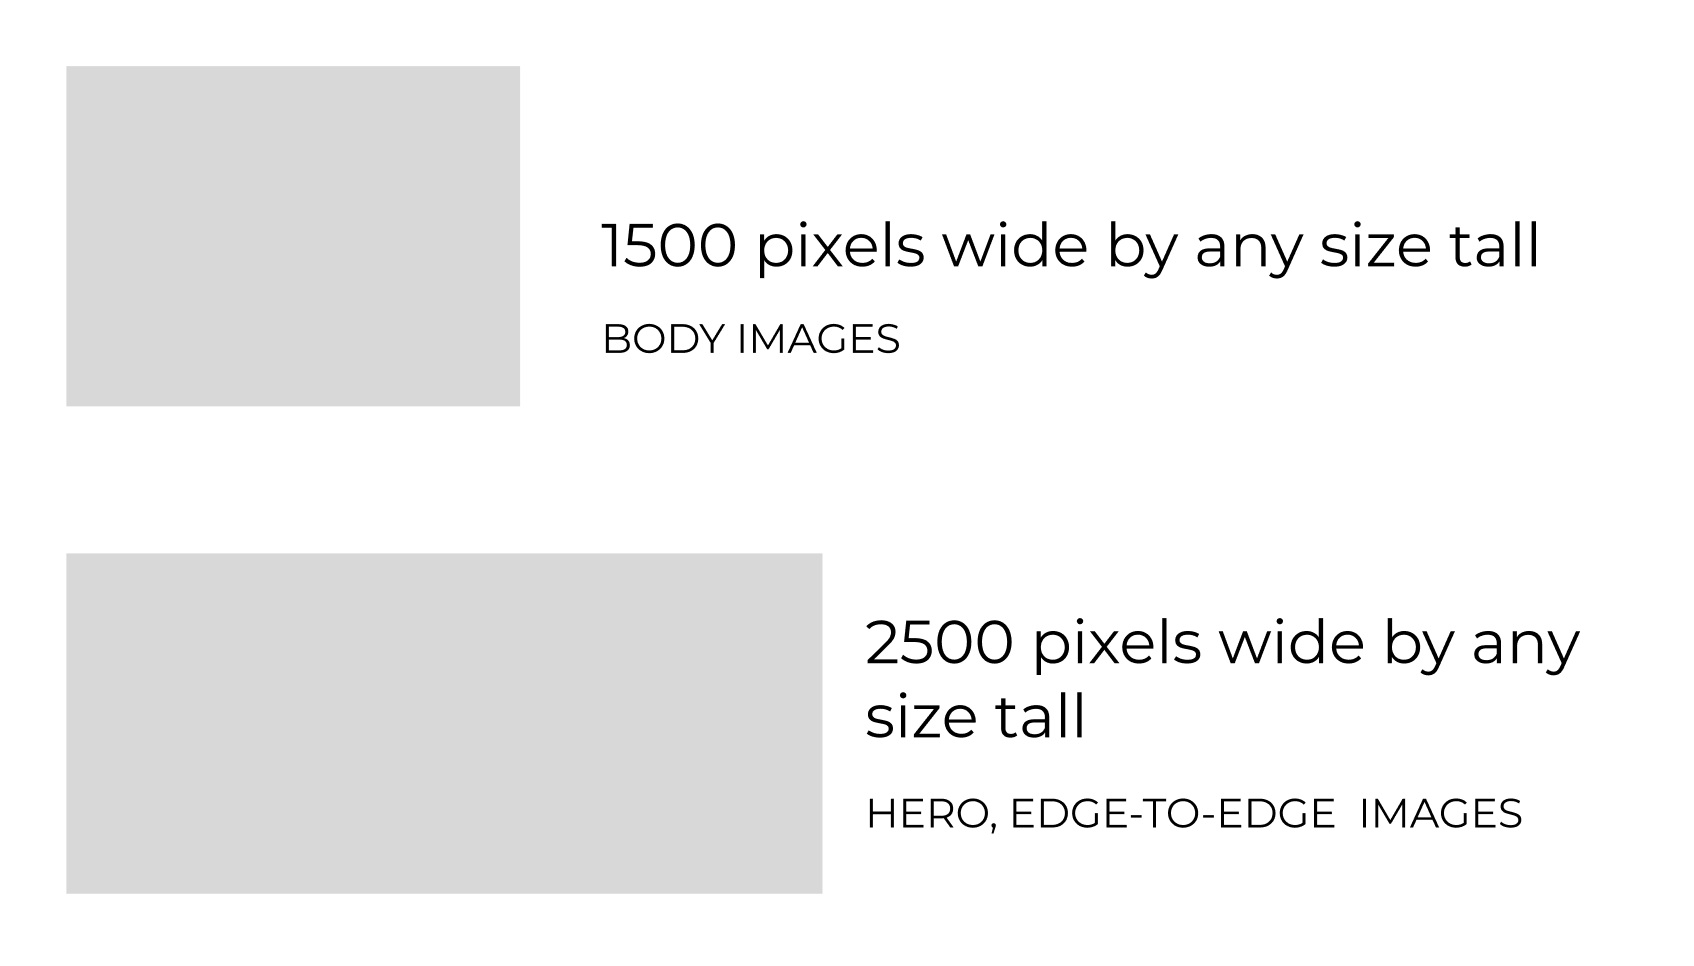

This is primarily a recommendation if you’re using Squarespace but it’s a model you can start with, with any content management system to be sure your images are both big enough and not too big.
Squarespace Images are special :)
When you upload an image on Squarespace, Squarespace creates up to seven versions of that image. The different images are sized down to work best on the device that’s loading the image.
If you’re on your phone for example, Squarespace would choose to use the 300 pixel size it created — smaller and faster loading.
Image focal point within Squarespace
After uploading your image, you have the option of moving the “focal point” or a little white circle over your image. In addition to loading a smaller image, Squarespace will crop wide, landscape images to fit better on devices like phones. The focal point helps you make sure the most important part of the image is not cropped out.
#4 File Naming: Use Keywords, No Spaces and hyphens between words
NO SPACES
The following image file:
“my favorite filename always has spaces in it.jpg”
will look like this when uploaded to a website:
“my%20favorite%20filename%20always%20has%20spaces%20in%20it.jpg”
Change it to:
my-favorite-filename-always-has-spaces-in-it.jpg
Google and search engines love the dash or hyphen. Stay away from any other special characters — underscores are also not recommended.